GR5526 (5)- Build a reference application for Lvgl
[TOC]
1. Foreword
LVGL (Little and Versatile Graphics Library) is a GUI framework which is widely used in the embedded field, and its most important feature is that it comes with a complete and easy-to-use control/style library and rendering methods. Its simple and easy to understand API design allows almost anyone with GUI development experience to get started quickly, even if it is relatively easy to learn without relevant experience.
GR5526, a BLE SoC that can be said to be born for screen brushing, also has a screen brushing demonstration project based on LVGL in its official SDK. Starting from the graphics _ lvgl _ 831 _ GPU _ demo demonstration project in GR5526 SDK V1.0.1, this series will explain how to use LVGL to fully understand the LVGL framework.
2.Download the sample project for a taste
Since the Example project is already provided in the SDK package, let’s download the project first to see the effect.
Use Keil to open the project file located at projects/peripheral/graphics/graphics _ lvgl _ 831 _ GPU _ demo/keil-5/graphics _ lvgl _ 831 _ GPU _ demo. Uvprojx, You can see the official Example project:
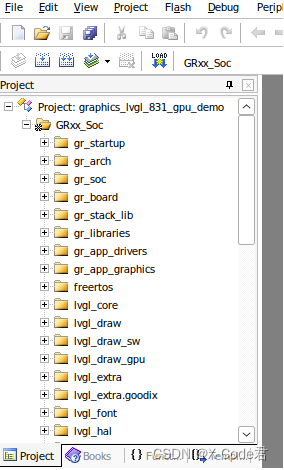
It can be seen that the content of the project is quite complicated, but it doesn’t matter. Let’s first download the firmware to see the effect, and then slowly gnaw this hard bone. Click the Build button or press the shortcut key F7 to compile. The initial compilation may take a long time.
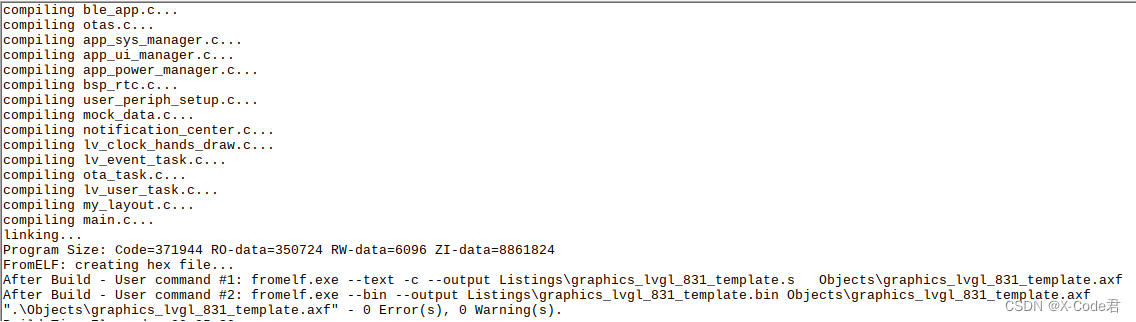
After the compilation is completed, click the Download button or press the shortcut key F8 to download, wait for the firmware download to be completed, and then you can see the effect:
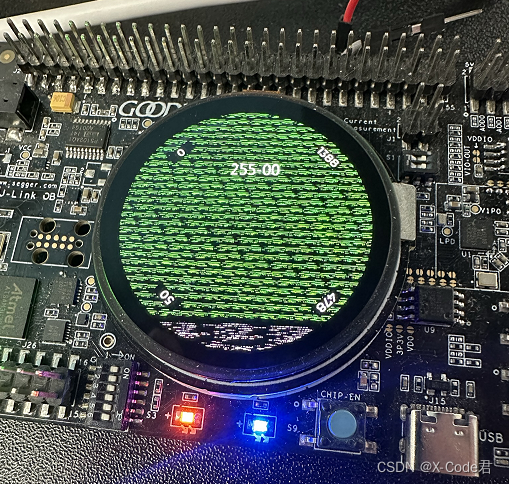
As you can see, the screen is flowery. Because the image resource referenced by Example is not stored in the same location as the firmware, the image resource needs to be downloaded separately, and the GProgrammer tool needs to be used. After opening GProgrammer, find the option of GR5526VGBIP and click OK:
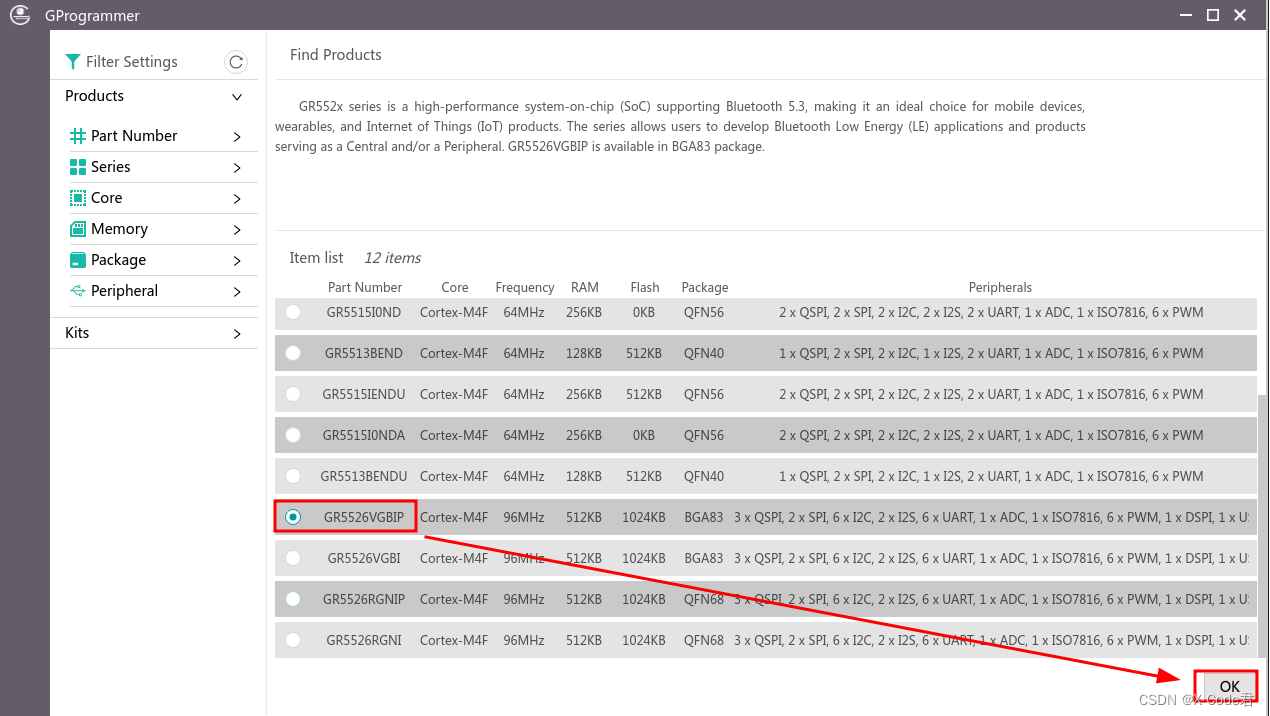
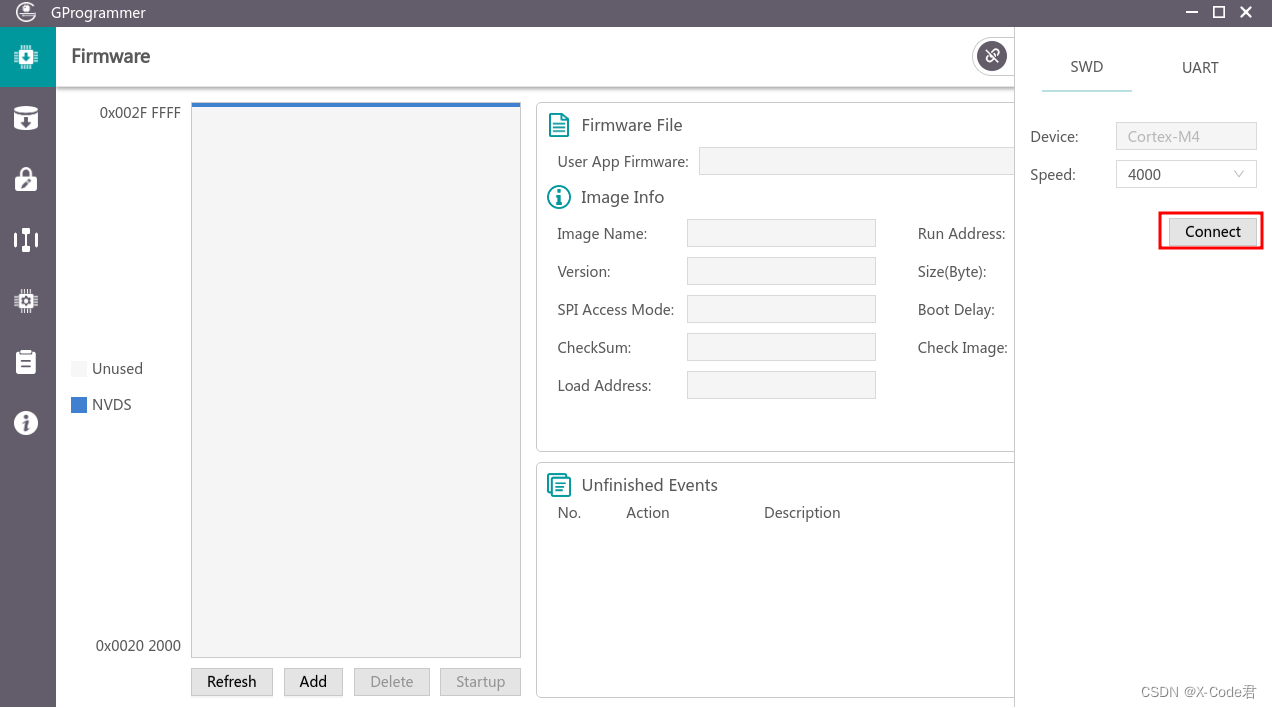
Then there will be a pop-up window on the right, click Connect to connect to the development board:
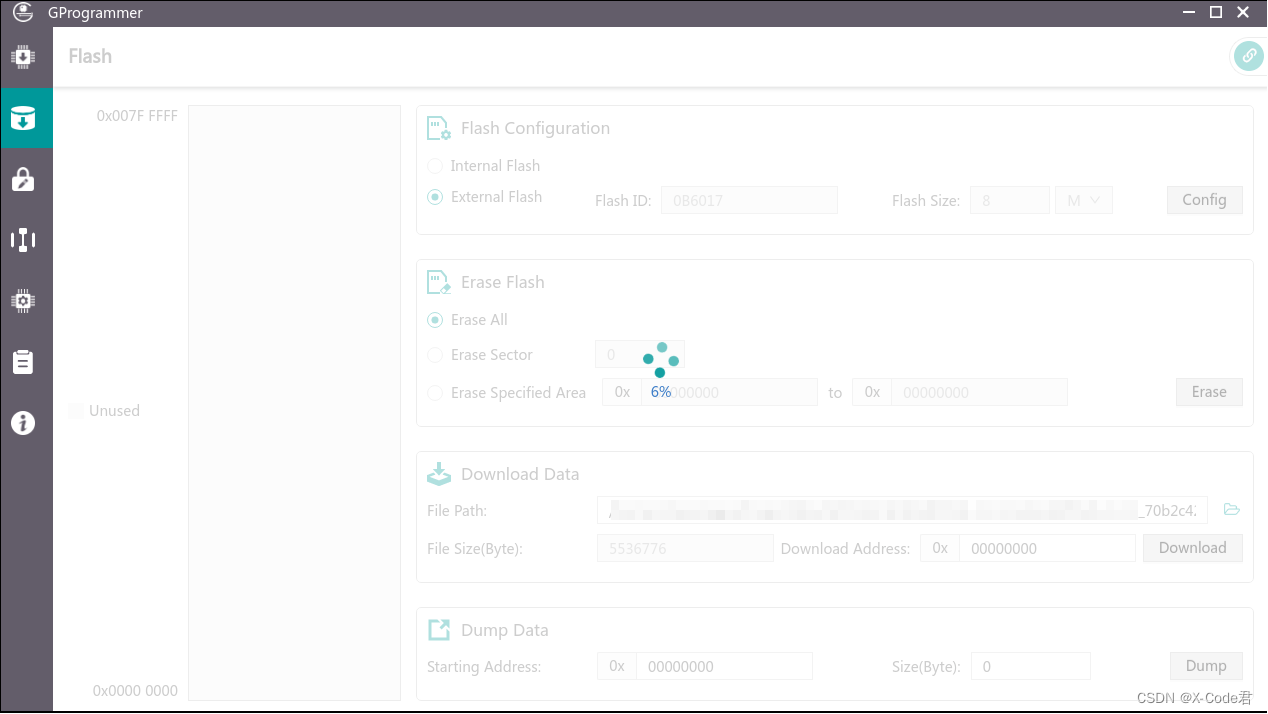
After the development board is connected, select the second “Flash” in the left row of icons to enter the resource burning interface:
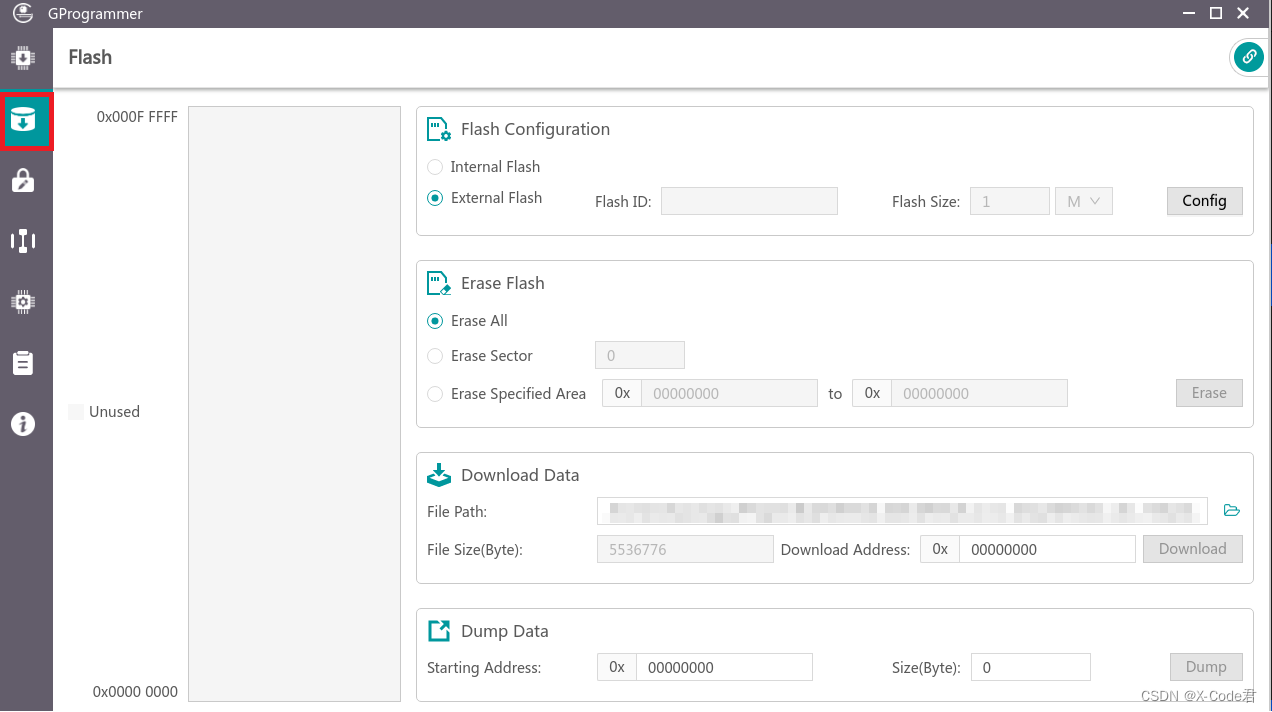
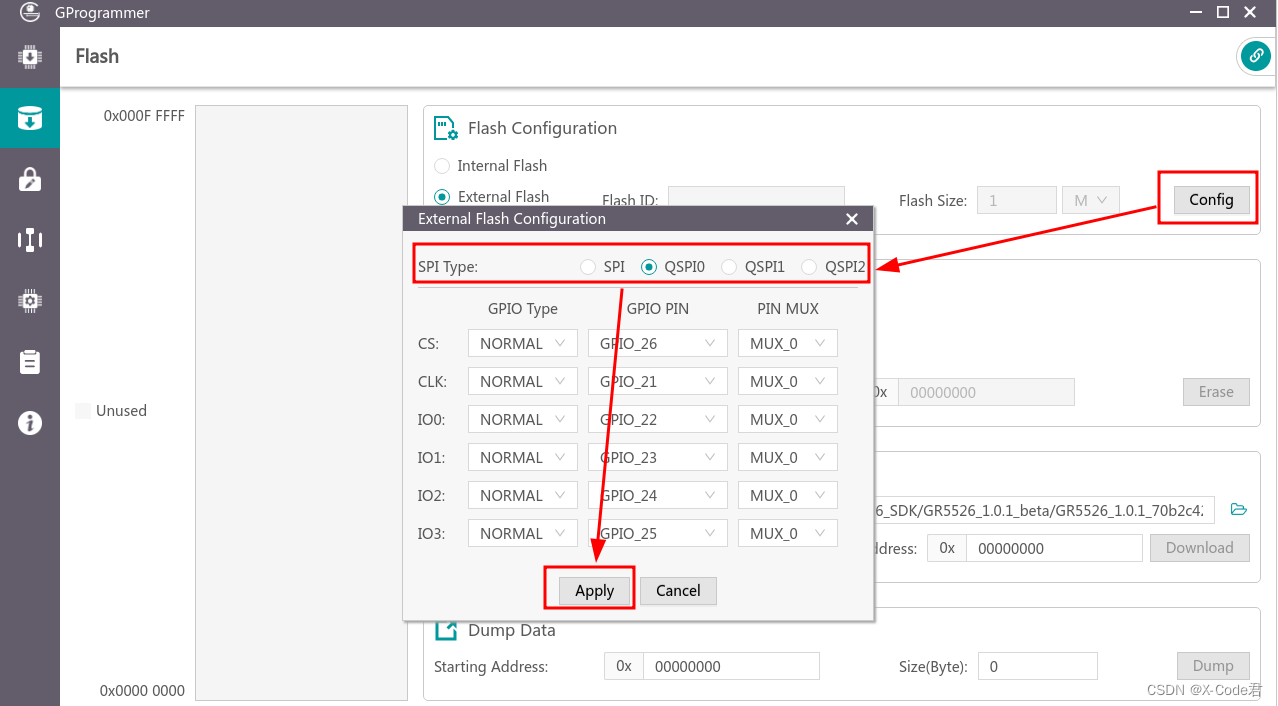
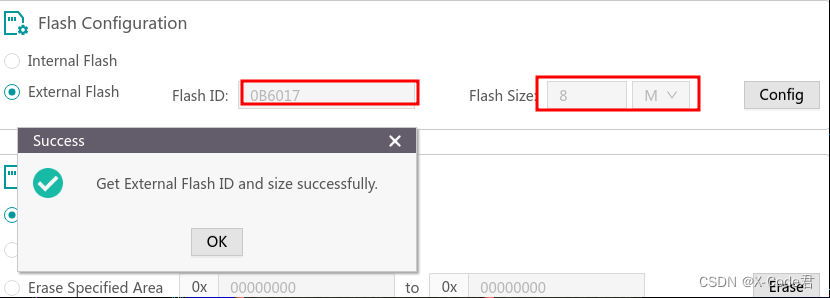
Select External Flash and click Config. A dialog box will pop up, asking to select the interface corresponding to the Flash of the storage resource. For the GR5526 SK development board, select QSPI0, keep the default configuration for the rest, and click Apply. Moments later, you can see that GProgrammer has recognized the XTX25Q64B 8m Flash on the board.
In the Download Data area below, click the folder on the right to find the image resource file. The image resource file has a 0x0000 _ 2023-06-06 _ 17-38-37.bin in the Image _ Resource folder of the Example project. Select this file, fill in 0 for the download address, and click Download to start downloading the image resource. Since this resource is more than 5m, it should take some time to download.

After downloading, press the Reset button on the board to let the firmware run again, and then see the effect:
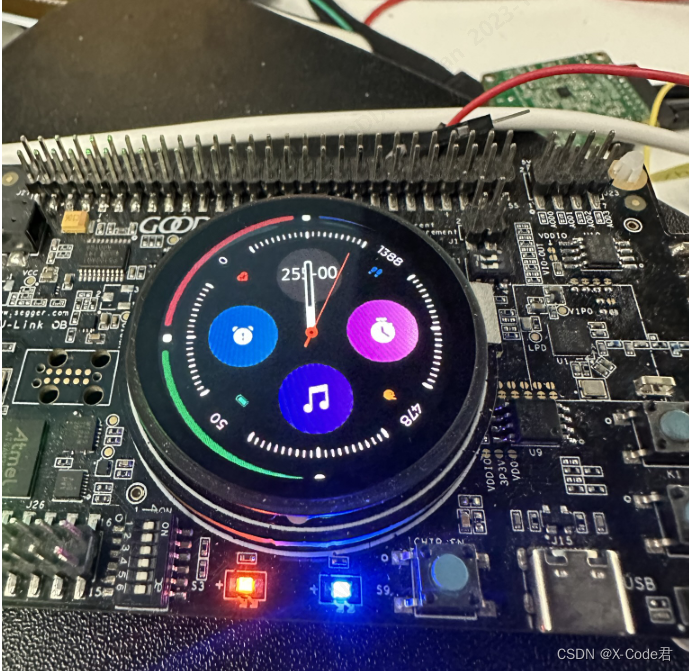
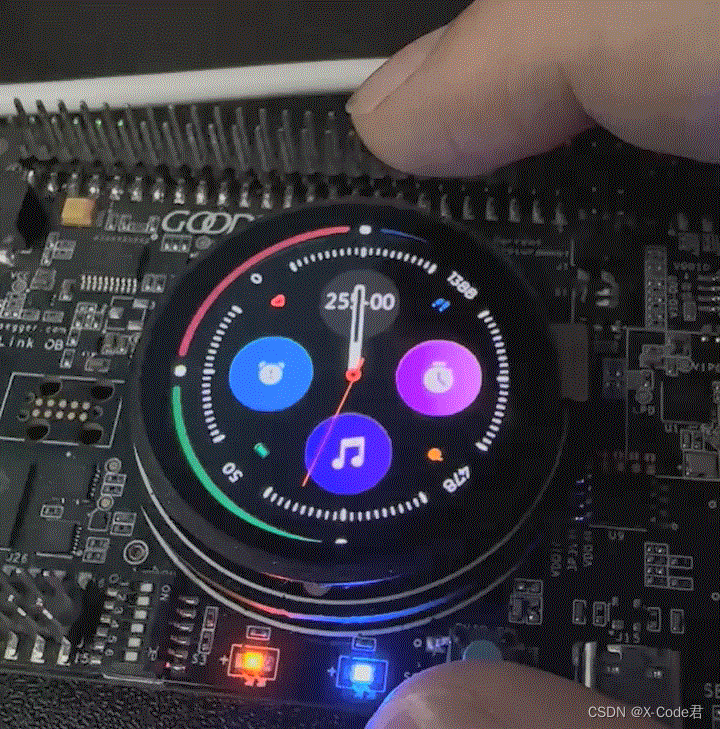
(The stutter is a GIF problem, and the actual effect is very smooth.)
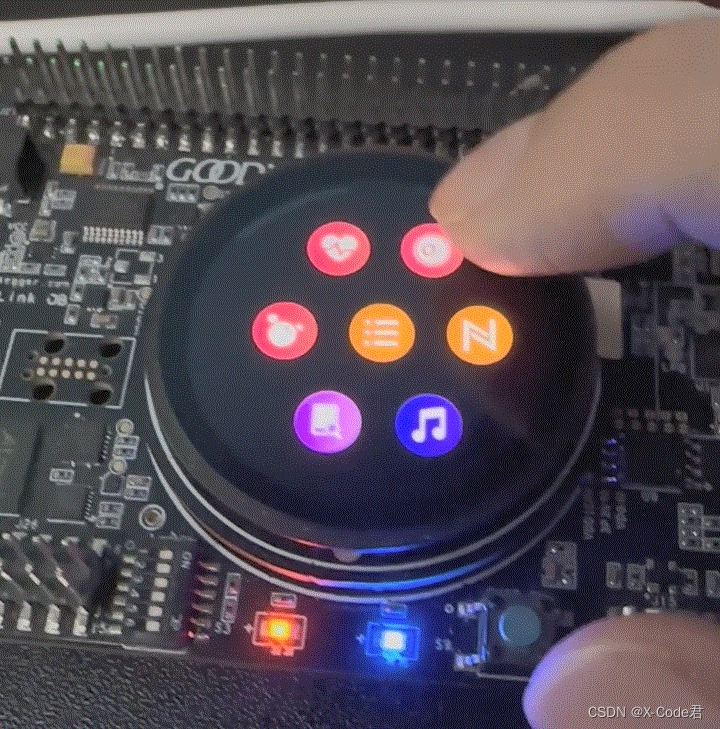
You can see that an interface similar to a smart watch has come out. Slide it and click it. It seems that there are quite a lot of interfaces. And there are some 3D animation effects in the process of sliding, which looks cool.
3. Write the first LVGL interface
3.1 Find the GUI entry point
Example Finished, now back to the topic, to make our own LVGL interface. Before we start writing code, we need to know where to put our own code. Start with the main () function, open the main. C, and find the main () function:
static void vStartTasks(void *arg)
{
	lv_user_task_create();
	osal_task_delete(NULL);
}

int main(void)
{
	app_graphics_adjust_dcore_policy();                             /*<Should call this firstly if using graphics modules */
	SetSerialClock(SERIAL_N96M_CLK);
	app_periph_init();                                              /*<Init user periph .*/
	// Initialize ble stack.
	ble_stack_init(ble_evt_handler, &heaps_table);
	osal_task_create("create_task", vStartTasks, 1024, 0, NULL);
	osal_task_start();
	for (;;);                                                       /*< Never perform here */
}
Those who are familiar with RTOS may see at a glance that although a layer is packaged with osal _ task _ XXX, the actual project is built based on FreeRTOS. The content of the operating system is not expanded here, because it is pre-configured by the template project, we can use it directly, and we don’t need to care too much about the details.
It can be seen that a vTaskStart task is created in main (), and a function called lv _ user _ task _ create () is executed in vTaskStart. Literally, this must be the entry of the GUI thread. Follow it and have a look:
void lv_user_task_create(void)
{
	osal_task_create("task_indev", app_indev_read_task, TASK_SIZE_TOUCHPAD_READ, TASK_PRIO_TOUCHPAD_READ, &g_task_handle.indev_handle);
	osal_task_create("task_gui",   app_gui_render_task, TASK_SIZE_GUI_RENDER,    TASK_PRIO_GUI_RENDER,    &g_task_handle.gui_handle);
	extern void lv_gui_evt_task_startup(void);
	lv_gui_evt_task_startup();
}
As you can see, this function creates two tasks, one to handle the GUI and the other to handle the input device. Let’s follow along with the task of dealing with the GUI:
void app_gui_render_task(void *p_arg)
{
	uint32_t delayTime = 0;
	mock_data_init_pre_gui();
	lvgl_env_init();
	lv_layout_router_init();
	mock_data_init_post_gui();
	while(1){
		delayTime = lv_task_handler();
		if(SYS_STATE_SLEEP != sys_state_get()) {
			//osal_task_delay(delayTime);
			osal_sema_take(s_gui_refresh_sem, delayTime);
		} else {
			osal_sema_take(s_gui_refresh_sem, OSAL_MAX_DELAY);
		}
	}
}
Looks like this is the entry point we’re looking for. The mock _ data _ init _ pre _ gui (), lv _ layout _ router _ init (), and mock _ data _ init _ post _ gui () are all Demo-related. Only the lvgl _ env _ init () is the part that actually initializes the LVGL. So we just delete the irrelevant content so that we can add our own interface later:
void app_gui_render_task(void *p_arg)
{
	uint32_t delayTime = 0;
	lvgl_env_init();
	/**
	My Code Here
	**/
	while(1){
		delayTime = lv_task_handler();
		if(SYS_STATE_SLEEP != sys_state_get()) {
			//osal_task_delay(delayTime);
			osal_sema_take(s_gui_refresh_sem, delayTime);
		} else {
			osal_sema_take(s_gui_refresh_sem, OSAL_MAX_DELAY);
		}
	}
}
3.Write a LVGL interface
Now let’s write a simple LVGL interface, create a new my _ layout. C anywhere, add it to the Keil project and write the following code:
#include "lvgl.h"

void my_first_lvgl_layout(void)
{
	lv_obj_t *screen = lv_obj_create(NULL);
	lv_obj_set_style_bg_color(screen, lv_color_black(), LV_PART_MAIN);
	lv_obj_set_style_bg_opa(screen, LV_OPA_COVER, LV_PART_MAIN);
	lv_obj_t *label = lv_label_create(screen);
	lv_label_set_text(label, "Hello World!");
	lv_obj_center(label);
	lv_scr_load(screen);
}
The content of the code is very simple, from top to bottom:
Create a window Set the window background color to black Set the window background color to opaque Create a label control in the window Set the contents of the label control to “Hello World!” Center the label control and load the window you just created Before going into detail about each function, Let’s get this code running first. Returning to the GUI thread in the lv _ user _ task. C, we call our own page creation function after LVGL initialization, like this:
 void app_gui_render_task(void *p_arg)
{
	uint32_t delayTime = 0;
	lvgl_env_init();
	extern void my_first_lvgl_layout(void);
	my_first_lvgl_layout();
	while(1){
		delayTime = lv_task_handler();
		if(SYS_STATE_SLEEP != sys_state_get()) {
			//osal_task_delay(delayTime);
			osal_sema_take(s_gui_refresh_sem, delayTime);
		} else {
			osal_sema_take(s_gui_refresh_sem, OSAL_MAX_DELAY);
		}
	}
}
It’s more orthodox to use a header file to expose all the public interfaces, so I’m just going to be lazy and call extern directly. After adding the code, compile and download it directly to see the effect:
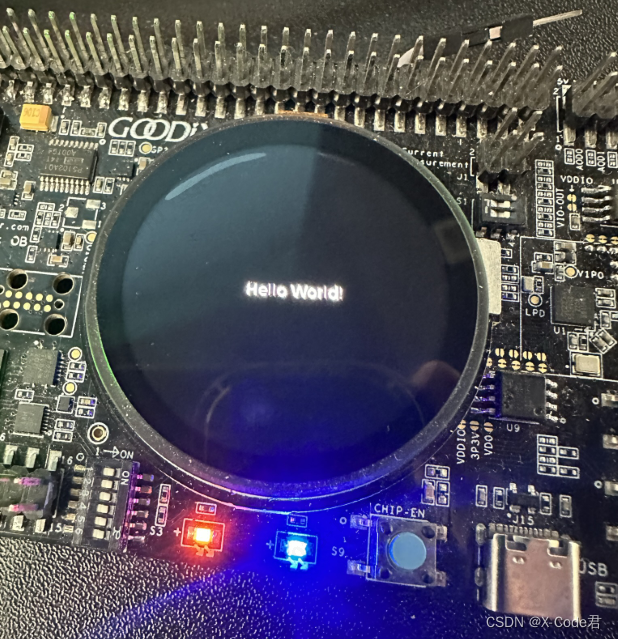
You can see the words “Hello World” appear in the middle of the screen, which is the window we just created. The following is a basic introduction to the use of LVGL based on the window just created.
4. LVGL basic concepts
In view of the concepts appearing in the above my _ first _ lvgl _ layout, here is a brief explanation.
4.1 LVGL object
When using LVGL to build a basic interface, the most basic unit is object. An object is essentially a struct, which stores a series of basic parameters that determine the attributes of the control, which can be roughly divided into the following categories:
Object tree relationship class: for example, parent object, child object, number of child objects.
Style class: for example, list of styles, number of styles.
Geometry classes: object positions, drawing areas, layout parameters, and so on.
Status class: object status, object function Flag, etc.
Scroll class: scroll position, scroll direction, scroll adsorption, etc.
Event response classes: event response functions, response event types, and so on.
All other controls “inherit” the lv _ obj _ t structure by putting it in the first place, with the effect that any derived controls will have the same underlying properties.
LVGL manages all objects according to the structure of the object tree. An object has one or zero parent objects, and an object can have several child objects:
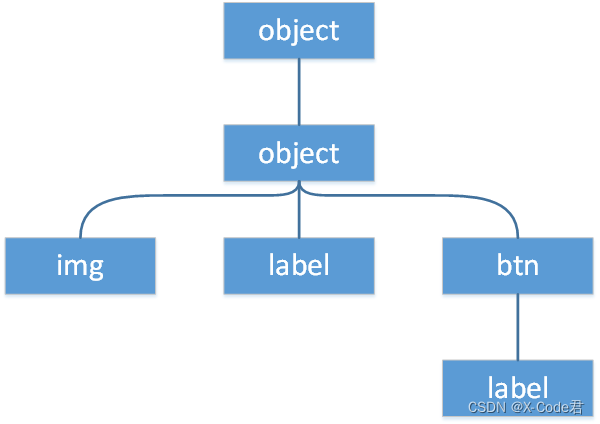
In an object tree, a parent object can be viewed as a container for its children. So the child objects are not displayed beyond the parent object, and the position of the child object is calculated relative to the parent object.
For example, when the position of the parent object is (100, 120) and the position of the child object setting is (50, 70), the actual position of the child object relative to the screen is (100 + 50 = 150, 120 + 70 = 190). When the position of the parent object moves, the position of the child object will also move. In the same example above, when the parent object moves to (50, 60), the actual position of the child object will also move to (50 + 50 = 100, 60 + 70 = 130).
An object without a parent, the root node, is called a screen in LVGL. As you can see from the name, the screen is the basic object that hosts the layout. When using the lv _ obj _ create () to create an object, it needs to carry a parent parameter to specify the parent object of the new object. If parent is NULL, LVGL will think that the object being created is a screen, and will automatically set the length and width of the object to the length and width of the display, and add the current object to the screen list.
After creating the screen, you need to use the lv _ SCR _ load () function to load the created screen into the default display. When LVGL renders, it traverses the entire object tree in a depth-first manner starting from the screen of the current display, and renders each object step by step. The effect achieved in this way is that the object created first is rendered first, the object created later is rendered later, and the object created later will be overlaid on the first created object.
4.2 LVGL style
The style is the soul of LVGL to build a rich and varied GUI. LVGL refers to the design of CSS (Cascading Style Sheet, a style system used in the front-end development of web pages) when designing the style system, so the main features of CSS are basically supported by the style system of LVGL, and it is very easy for people with CSS foundation to use this system.
The basic unit of style in LVGL is a lv _ style _ t structure that stores a list of all style attributes. A lv _ style _ t structure can be bound to multiple objects, similar to the class concept in CSS.
There are two ways to set the style. One is to create a lv _ style _ t structure, use the lv _ style _ set _ XXX series function to set the style attribute, and finally use the lv _ obj _ add _ style () function to bind the created lv _ style _ t to object. This approach can save a lot of memory and time when a series of objects have a common style.
Another way is to directly use lv _ obj _ set _ style _ XXX functions to directly set the style attributes of the object. When setting, LVGL will automatically create its own lv _ style _ t structure for the target object and set the style attribute into it. When the object is deleted, the lv _ style _ t structure dedicated to the object will also be released, and there is no need to manually manage the memory, which is relatively worry-free and suitable for use when a single object has a small number of styles.
In addition, LVGL’s style system also supports state and part mechanisms similar to psuedo-classes and psuedo-elements in CSS, inheritance and cascade mechanisms, and so on. These “advanced features” will be described later when the layout is used.
5. Revamping the first LVGL interface
After understanding some basic concepts, let’s beautify the Hello World interface.
First of all, the background, the black background is too boring, we change to red:
lv_obj_set_style_bg_color(screen, lv_color_make(255, 0, 0), LV_PART_MAIN);
Lv _ color _ make () is a utility function provided by LVGL to create a color from RGB values.
After changing the background color, let’s change the font of the label. In LVGL, the font is also an attribute of style, so use the lv _ obj _ style _ set _ text _ font () function to set it:
lv_obj_set_style_text_font(label, &lv_font_montserrat_48, LV_PART_MAIN);
Lv _ font _ Montserrat _ 48 is a built-in font of LVGL, which is also enabled in the Example project, so it can be used directly.
Then we set a semi-transparent background color for the label tag and a rounded corner effect:
lv_obj_set_style_bg_color(label, lv_color_black(), LV_PART_MAIN); // 设置背景色为黑色
lv_obj_set_style_bg_opa(label, LV_OPA_50, LV_PART_MAIN); // 设置背景透明度为50%
lv_obj_set_style_radius(label, 10, LV_PART_MAIN); // 设置圆角半径为10像素
Finally, we add a button to the window and add a label in the middle of the button to display the content. Since the Example project does not use the default theme of LVGL, the button we created does not have a default style, and we need to add some styles to it:
lv_obj_t *btn = lv_btn_create(screen); // 以screen为父对象创建一个btn控件
lv_obj_set_size(btn, 200, 50); // 将btn控件的size设置为宽200px,高50px
lv_obj_set_pos(btn, 127, 300); // 将btn控件的位置设置为(127, 300)
lv_obj_set_style_bg_color(btn, lv_palette_main(LV_PALETTE_BLUE), LV_PART_MAIN); // 将btn控件的背景色设置为主调色盘中的蓝色
lv_obj_set_style_bg_opa(btn, LV_OPA_COVER, LV_PART_MAIN); // 将btn控件的背景透明度设置为不透明
lv_obj_set_style_radius(btn, LV_RADIUS_CIRCLE, LV_PART_MAIN); // 将btn控件的圆角设置为完全圆形
lv_obj_t *btn_label = lv_label_create(btn); // 以btn控件为父对象创建一个label控件
lv_label_set_text(btn_label, "Click Me"); // 设置label内容为"Click Me"
lv_obj_center(btn_label); // 将label控件居中(btn控件的正中间)
The current btn control does not have any click effect, nor does it have any response after clicking. These will be introduced in the next article.
The final layout code is as follows:
 void my_first_lvgl_layout(void)
{
	lv_obj_t *screen = lv_obj_create(NULL);
	lv_obj_set_style_bg_color(screen, lv_color_make(255, 0, 0), LV_PART_MAIN);
	lv_obj_set_style_bg_opa(screen, LV_OPA_COVER, LV_PART_MAIN);
	lv_obj_t *label = lv_label_create(screen);
	lv_obj_set_style_text_font(label, &lv_font_montserrat_48, LV_PART_MAIN);
	lv_obj_set_style_bg_color(label, lv_color_black(), LV_PART_MAIN);
	lv_obj_set_style_bg_opa(label, LV_OPA_50, LV_PART_MAIN);
	lv_obj_set_style_radius(label, 10, LV_PART_MAIN);
	lv_label_set_text(label, "Hello World!");
	lv_obj_center(label);
	lv_obj_t *btn = lv_btn_create(screen);
	lv_obj_set_size(btn, 200, 50);
	lv_obj_set_pos(btn, 127, 300);
	lv_obj_set_style_bg_color(btn, lv_palette_main(LV_PALETTE_BLUE), LV_PART_MAIN);
	lv_obj_set_style_bg_opa(btn, LV_OPA_COVER, LV_PART_MAIN);
	lv_obj_set_style_radius(btn, LV_RADIUS_CIRCLE, LV_PART_MAIN);
	lv_obj_t *btn_label = lv_label_create(btn);
	lv_label_set_text(btn_label, "Click Me");
	lv_obj_center(btn_label);
	lv_scr_load(screen);
}
Compile, download, to see the effect:
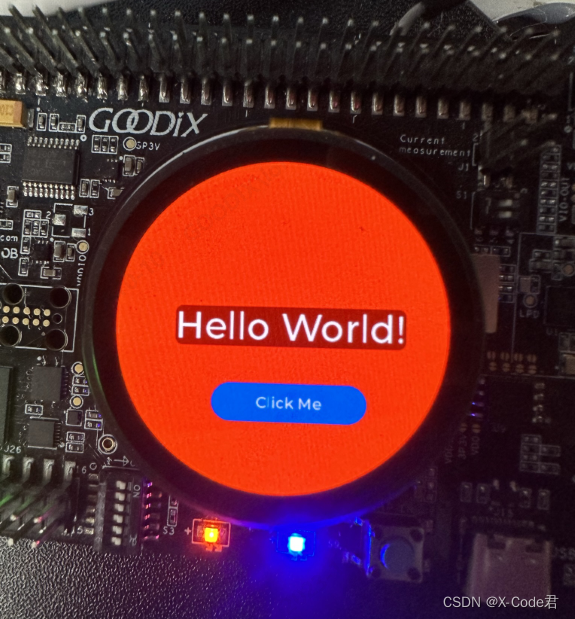
As you can see, the styles we set and the new controls we added are displayed correctly. Through a simple layout example, this article describes how to build a simple LV GL interface based on the LVGL Example in the GR5526 SDK. In the next article, I’ll make the interface really interactive by adding a press animation and an event handler for the last btn control added.